Deploy Your Medusa Server to DigitalOcean Apps
In this document, you'll learn how to deploy your Medusa server to a DigitalOcean App.
DigitalOcean is a reliable hosting provider that provides different ways to host websites and servers. One way to host a server is using their DigitalOcean App Platform.
Prerequisites
Medusa Server
It is assumed that you already have a Medusa server installed locally. If you don’t, please follow the quickstart guide.
Furthermore, your Medusa server should be configured to work with PostgreSQL and Redis. You can follow the Configure your Server documentation to learn how to do that.
Needed Accounts
- A DigitalOcean account. You need to provide a payment method on sign up.
- A GitHub account to create a repository to host your server’s codebase.
If you want to use another Git Provider supported by DigitalOcean, it’s possible to follow along with this guide but you’ll have to perform the equivalent steps in your Git Provider.
Required Tools
- Git’s CLI tool. You can follow this documentation to learn how to install it for your operating system.
Changes to package.json
Change the start script in package.json to the following:
"start": "medusa migrations run && medusa start"
This ensures that Migrations are run everytime the Medusa server is restarted.
Changes to medusa-config.js
In medusa-config.js, the DATABASE_URL variable is set to the environment variable DATABASE_URL. This needs to be changed as DigitalOcean provides the different details of the database connection separately.
Replace the previous declaration of DATABASE_URL in medusa-config.js with the following:
const DB_USERNAME = process.env.DB_USERNAME
const DB_PASSWORD = process.env.DB_PASSWORD
const DB_HOST = process.env.DB_HOST
const DB_PORT = process.env.DB_PORT
const DB_DATABASE = process.env.DB_DATABASE

const DATABASE_URL =
  `postgres://${DB_USERNAME}:${DB_PASSWORD}` +
  `@${DB_HOST}:${DB_PORT}/${DB_DATABASE}`
In addition, you must add to projectConfig in the exported object a new property database_extra:
module.exports = {
  projectConfig: {
    // ...
    database_extra: { ssl: { rejectUnauthorized: false } },
  },
}
Create GitHub Repository
Before you can deploy your Medusa server you need to create a GitHub repository and push the code base to it.
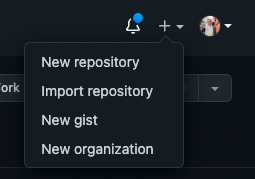
On GitHub, click the plus icon at the top right, then click New Repository.
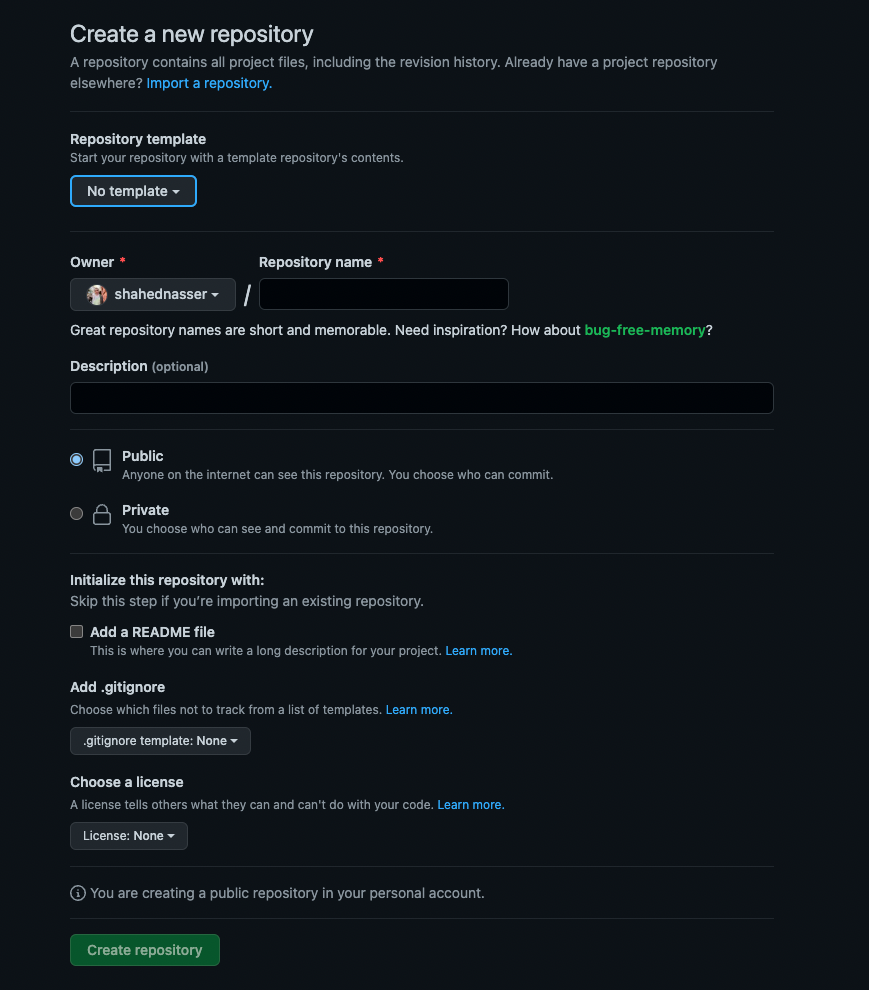
You’ll then be redirected to a new page with a form. In the form, enter the Repository Name then scroll down and click Create repository.
Push Code to GitHub Repository
The next step is to push the code to the GitHub repository you just created.
After creating the repository, you’ll be redirected to the repository’s page. On that page, you should see a URL that you can copy to connect your repository to a local directory.

Copy the link. Then, open your terminal in the directory that holds your Medusa server codebase and run the following commands:
git init
git remote add origin <GITHUB_URL>
Where <GITHUB_URL> is the URL you just copied.
Then, add, commit, and push the changes into the repository:
git add .
git commit -m "initial commit"
git push origin master
After pushing the changes, you can find the files in your GitHub repository.
Deploy to DigitalOcean App
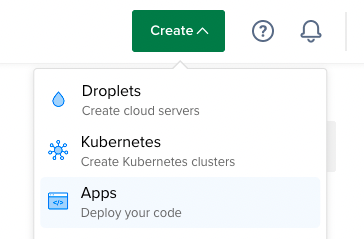
After logging into your account, click on the Create button at the top right, then choose App.
Choose Repository
In the Create App page, choose GitHub from the Service Provider list.
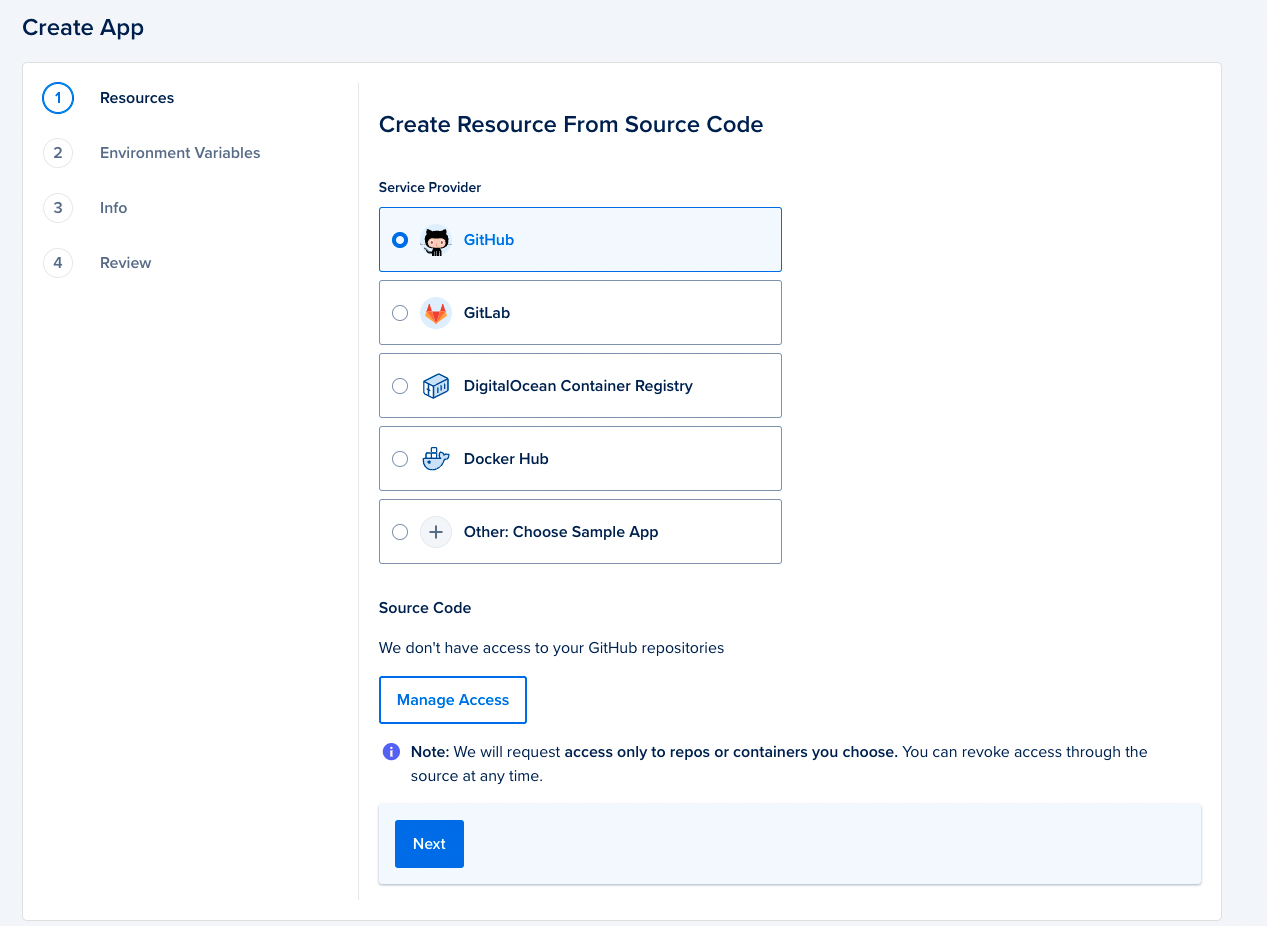
If you haven’t given DigitalOcean access before, click on Manage Access under Source Code. You’ll then be redirected to GitHub to give DigitalOcean access.
Once DigitalOcean have access to your GitHub account, you should see a Repository input. Click on it and search for the repository you created earlier.
Additional inputs will show up to choose the Branch, Source Directory, and Autodeploy options.
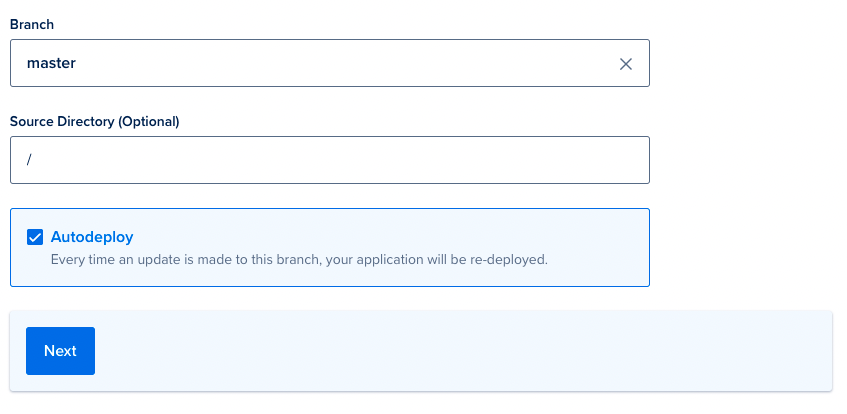
If you host your Medusa server in a monorepo, you should change the Source Directory to the directory the server is available in the repository. Otherwise, it can be left as is.
Once you’re done, click Next to move on to the next step.
Specify Web Service Resources
In the next step, you’ll see the resources to create.
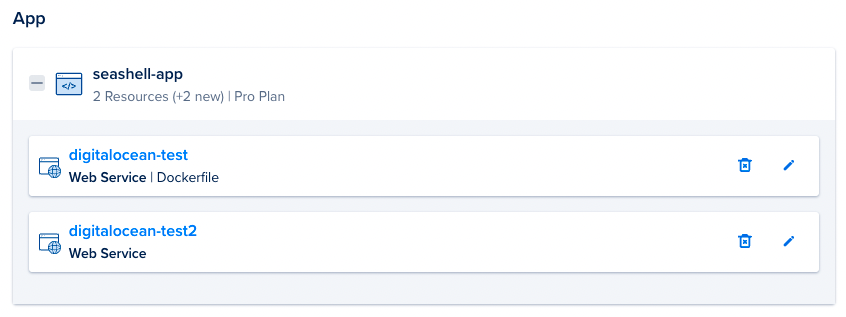
If you have a Dockerfile available in the server’s codebase (which is available by default), you’ll have two resources showing. You can remove it by clicking on the trash icon at the right of the resource.
By default, DigitalOcean hosts the web service in a sub-path of the domain name of the created App. To change it to the root of the domain, click on the edit icon at the right of the Web Service resource.
Then, scroll to HTTP Request Routes and expand it by clicking on Edit at its right. Change the value of the Routes input to /.
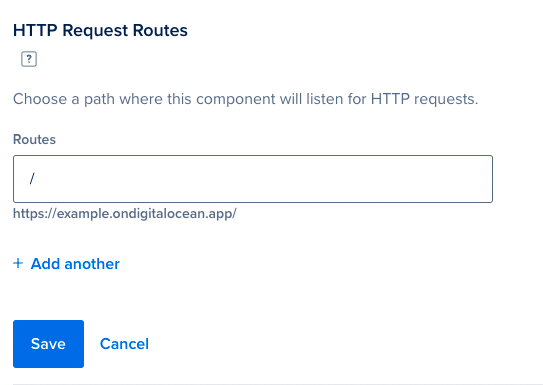
Once you’re done click Save. You’ll be taken back to the Resources page.
Specify Database Resources
On the same page, expand the Add Resources section, choose Database, then click Add.

In the new page, you’ll be shown a PostgreSQL database to be created. Notice that it’s important to choose a name that you’ll remember as you’ll need the name in next steps. You can leave the name as is if it’s not necessary to change it.
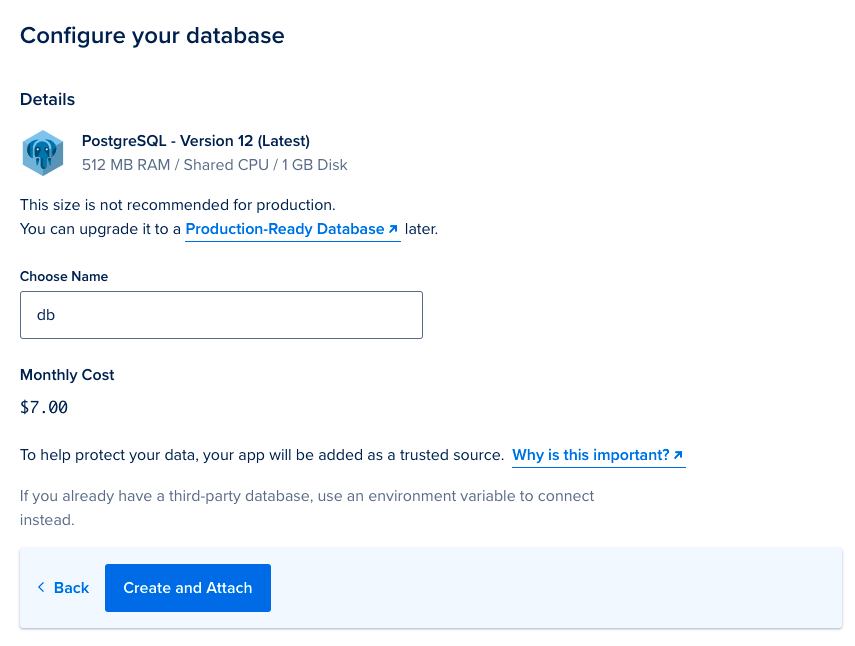
Once you’re done, click Create and Attach. You’ll be redirected back to the previous page with the database added to the resources.

Once you’re done, click Next to move on to the next step.
Set Environment Variables
In this section, you’ll add environment variables that are essential to your Medusa server.
You should see two ways to add environment variables: Global or specific to the Web Service.
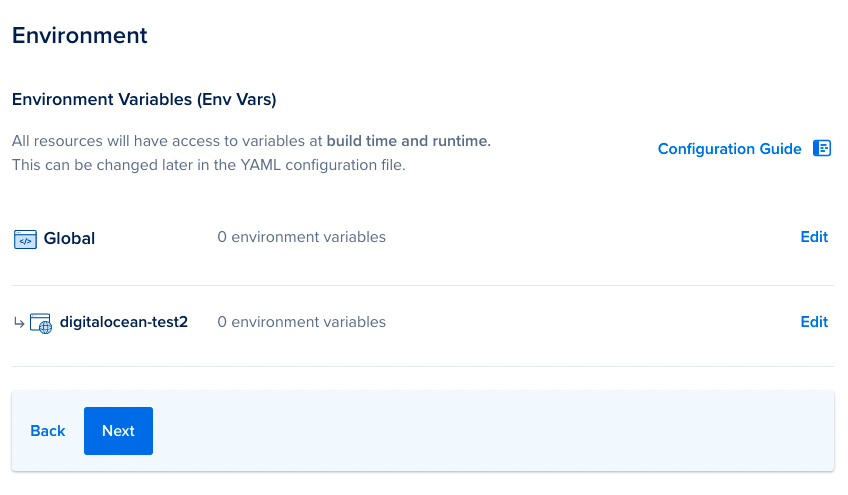
Click Edit on the second row to add environment variables specific to the Web Service. Add the following environment variables:
DB_USERNAME=${db.USERNAME}
DB_PASSWORD=${db.PASSWORD}
DB_HOST=${db.HOSTNAME}
DB_PORT=${db.PORT}
DB_DATABASE=${db.DATABASE}
REDIS_URL=${redis.DATABASE_URL}
JWT_SECRET=secret
COOKIE_SECRET=secret
NPM_CONFIG_PRODUCTION=false
NODE_ENV=production
Notice how for database environment variables you access the values from the database you created earlier db. If you changed the name of the database, you must change db here to the name you supplied to the PostgreSQL database.
Another thing to note here is that you added a REDIS_URL environment variable that uses a redis resource to retrieve the URL. You’ll be creating this resource in a later section.
It’s highly recommended to use strong, randomly generated secrets for JWT_SECRET and COOKIE_SECRET.
Once you’re done click Save.
Finalize App
In the next section, you’ll be shown the app info and the region it will be deployed to. You can leave it all as is or make changes if you find it necessary.
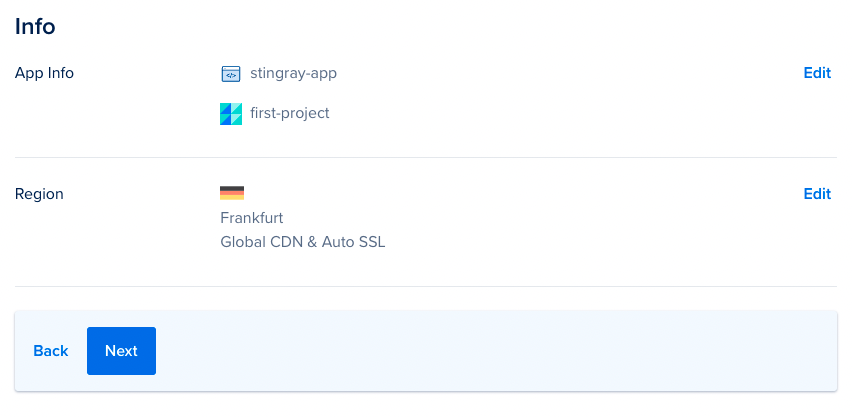
Once you’re done, click Next to go to the next step.
In the final step, you can see a review of everything you created. If everything looks good, scroll down and click Create Resource.
Create Redis Resource
While the server is being deployed, you can create the Redis resource.
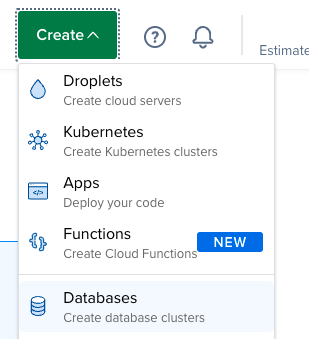
Click the Create button at the top right and choose Database from the dropdown.
In the new page under Choose a database engine, choose Redis.
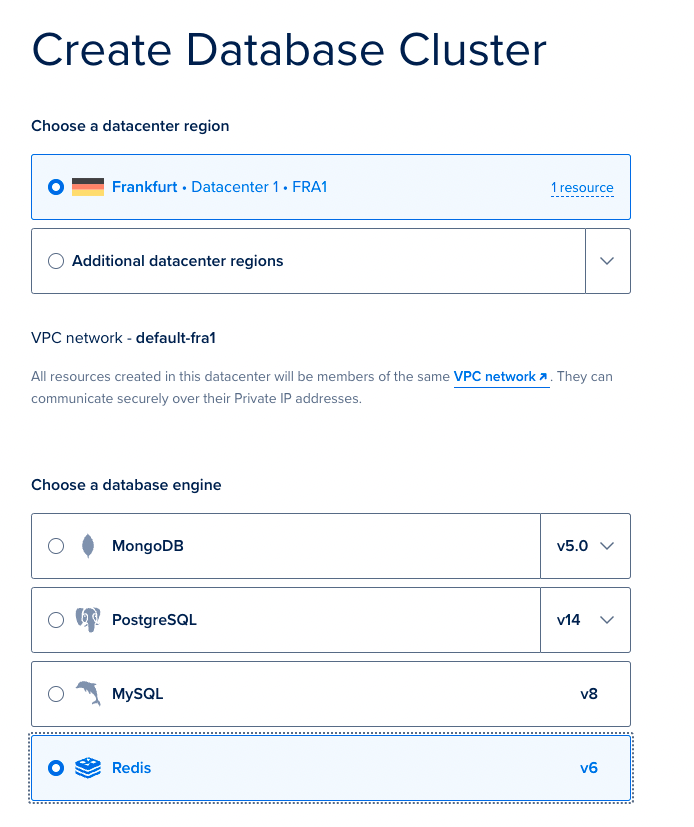
Then, scroll down to the “Choose a name” input. Since you used the name redis in the REDIS_URL environment variables, change the value to redis here.

Once you’re done, click on Create Database Cluster.
Attach Redis Database
Once the Redis database is created go back to the App you created earlier by choose Apps in the sidebar then clicking on the App name.
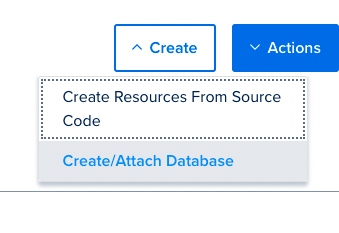
Click at the white Create button at the top right and choose Create/Attach Database.
In the new page, click on the Previously Created DigitalOcean Database radio button. Then, under Database Cluster select the Redis database you just created.
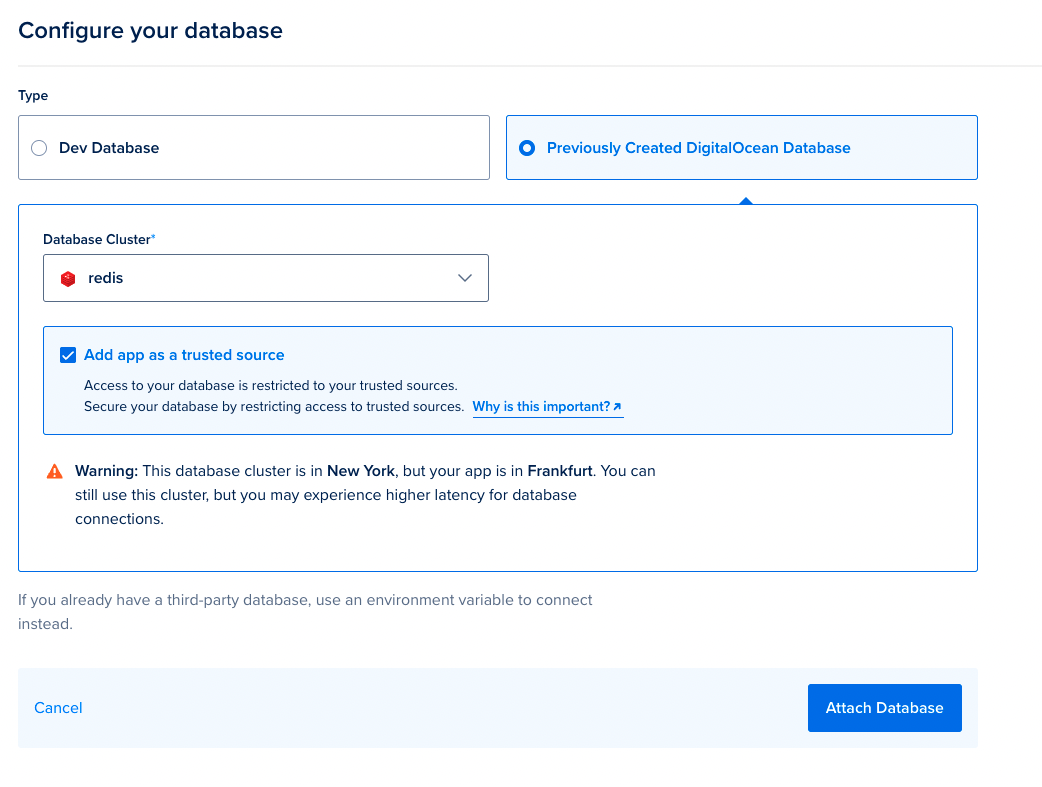
Once you’re done click Attach Database. This will add the Redis database to the list of resources of your App and will trigger a redeploy of the App.
Test your Server
Once the redeployment is complete, copy the URL of the App which can be found under the App’s name.

Then, go to <YOUR_APP_URL>/store/products. If the deployment was successful, you should receive a JSON response.

Run Commands on Your Server
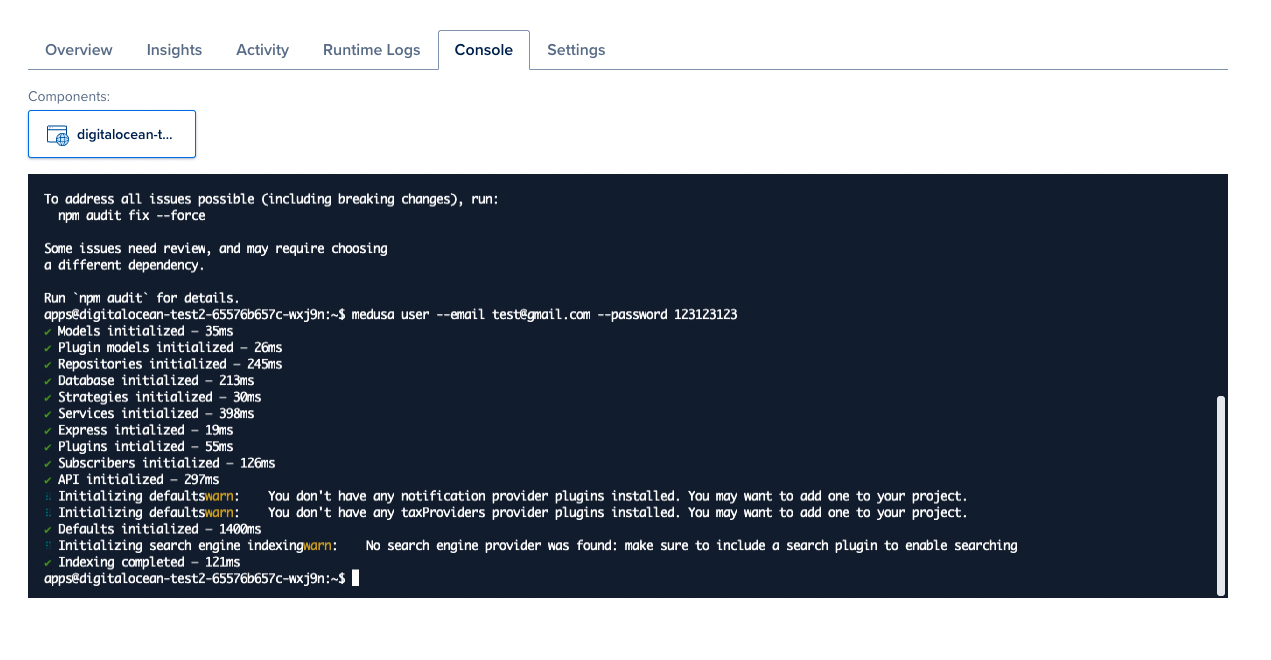
To run commands on your server, you can access the console on the App’s page by choosing the Console tab. This opens a console in your browser where you can run commands on your server.
For example, you can run the following commands to create a new admin user:
npm install @medusajs/medusa-cli -g
medusa user --email <EMAIL> --password <PASSWORD>
Make sure to replace <EMAIL> and <PASSWORD> with the credentials you want to give the user.
Add Environment Variables
You’ll likely need to add environment variables later such as Admin Cross-Origin Resource Sharing (CORS) and Store CORS variables.
To add environment variables, on the App’s page click on Settings and choose the Web Service component.

Then, scroll down and find Environment Variables. You can expand the environment variables by clicking Edit on the right. Here, you can edit, add, and remove environment variables.

Once you click Save, the environment variables will be saved and a redeployment will be triggered.


